
Table of Contents
- What is a light box for jewelry photography?
- What are the benefits of using a lightbox for jewelry photography?
- Proper illumination
- Well-controlled shadows and even lighting
- Uncluttered background
- Reduces the need for technical expertise
- What to look for when buying a lightbox for jewelry photography?
- The size of the lightbox
- Lighting options
- Background options
- Shooting angles
- How to Photograph Jewelry with the GemLightbox
- Step 1. Place the jewelry inside
- Step 2. Open the GemLightbox App
- Step 3. Click to capture
- Frequently Asked Questions:
- What is the best lighting for jewelry photography?
- How do you set up lighting for jewelry photography?
- Is a lightbox good for photography?
- How does a lightbox improve jewelry photography?
- Can I use a lightbox for other types of photography?
- How do you take pictures of earrings in a lightbox?

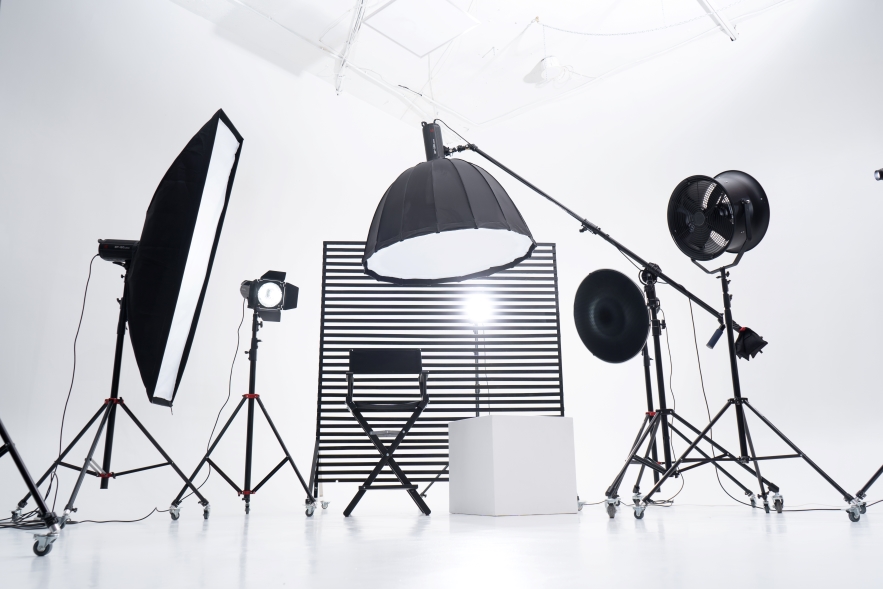
Unless you’re a professional photographer, you already know how challenging jewelry photography is by now. Jewelry pieces have physical properties that are not present in common commercial products, making them one of the most, if not the most, difficult objects to photograph. The not-so-secret key, however, is in the lighting. In this guide, we’ll let you in on the best light box for jewelry photography so you can finally focus on selling and less on the photography struggles.
Numerous factors contribute to professional-looking photos but none is more important than the light. It determines the tone, mood, brightness, and darkness of your photos; hence, controlling and manipulating light correctly is essential in your endeavor. We always say that not all jewelers are professional photographers so we tried to simplify the photography process as much as possible, so simple that we eliminated all other jewelry photography processes and left you with nothing to do but click. But before we get into that, let’s learn more about the light box for jewelry photography.
What is a light box for jewelry photography?
You’ve probably read it here before—soft, diffused lighting is the best type of lighting for jewelry photography. A light box evenly distributes light around your subject and helps you achieve the soft light effect. Look at your sheer curtain at home or the lampshade on your bedside table that diffuses the light instead of hitting you with harsh, direct lighting. That’s the concept behind a lightbox.
A lightbox is a portable studio with translucent white sides and a smooth white backdrop. It diffuses the incoming bright light from multiple sources and distributes it evenly around the object you’re photographing inside the box.
Lightboxes come in different sizes, materials, and features. The price varies depending on the functions and features you’re looking for in a lightbox for the object you plan to use it for. You can also DIY if that’s the route you’re willing to take.
What are the benefits of using a lightbox for jewelry photography?
Proper illumination
A good lightbox properly illuminates your jewelry piece because of the smooth white panels surrounding it. These panels will reflect evenly on your jewelry including hard-to-reach crevices.
Well-controlled shadows and even lighting
Because the light source emanates from all angles, you’re guaranteed an even light distribution. This also allows you to control or eliminate unwanted shadows.
Uncluttered background
If you’re planning to use these photographs in your product listings on an e-commerce platform or your website, the box provides you with a clean slate to bring focus to your jewelry piece. The lack of distraction in the white background allows your potential buyers to direct their full attention to the piece and make an informed purchase decision. This clean slate also makes it easy to work with in the post-production stage, if necessary.
Reduces the need for technical expertise
Some lightboxes already come with advanced features and functions; thereby, reducing the need for intermediate or advanced technical knowledge.
What to look for when buying a lightbox for jewelry photography?
When buying a lightbox for jewelry photography, look out for the following considerations.
The size of the lightbox
When buying a lightbox, think of the objects you want to use it for, and don’t forget to future-proof your decision. For instance, if you’re only selling small pieces of jewelry right now, are there expansion plans in the future where you would consider selling watches and long necklaces? If so, always choose a larger-sized lightbox. The excess space will give you more room to work with but don’t go overboard to the point that you would need a bigger storage space for it.
Lighting options
Choose a lightbox that comes with built-in lights. Doing so will cut your work time in half because it’s always the correct manipulation of light that will consume much of your time. A lightbox with lighting options integrated into the design will always be the superior option because the designer surely customized the light settings to meet the requirement of the object the lightbox was intended for.
Background options
The best light boxes in the market come with a built-in white background but also offer flexibility to accommodate other jewelry background requirements. Surely, a white background works perfectly for jewelry pieces. There’s a reason why giant e-commerce platforms like Amazon require white background photos. Not only does it give your jewelry a professional-looking finish when uploaded on your website’s product page, but it’s also the most buyer-friendly.
However, fine jewelry also looks luxurious and elegant on a black background; hence, look for a lightbox that gives you the freedom to switch between the two without too much fuss.
Shooting angles
Most lightboxes in the market offer a front shooting angle through an opening in front of the box. But advanced models should have at least an additional side or top opening to let you capture your jewelry pieces from either the side or the top angle.
How to Photograph Jewelry with the GemLightbox
Considering all the parameters given above, let’s take a look at how GemLightbox works in jewelry photography.
GemLightbox is the world’s first jewelry photography lightbox that comes with an adjustable lighting system and a larger photography space. This premier jewelry photography tool captures four (4) studio-quality photos and one (1) 360-degree video of jewelry and gemstones using just a smartphone with just one click.
Step 1. Place the jewelry inside

The GemLightbox Pro is the newest addition to the GemLightbox product range. It’s a plug-and-play solution with no setup required. First, plug in the adapter and place your jewelry inside the box.
As you can see, the GemLightbox Pro comes with additional props to hold your jewelry. If you’re photographing a necklace, use the necklace stand, use the watch holder for watches, or the T-bar for earrings.


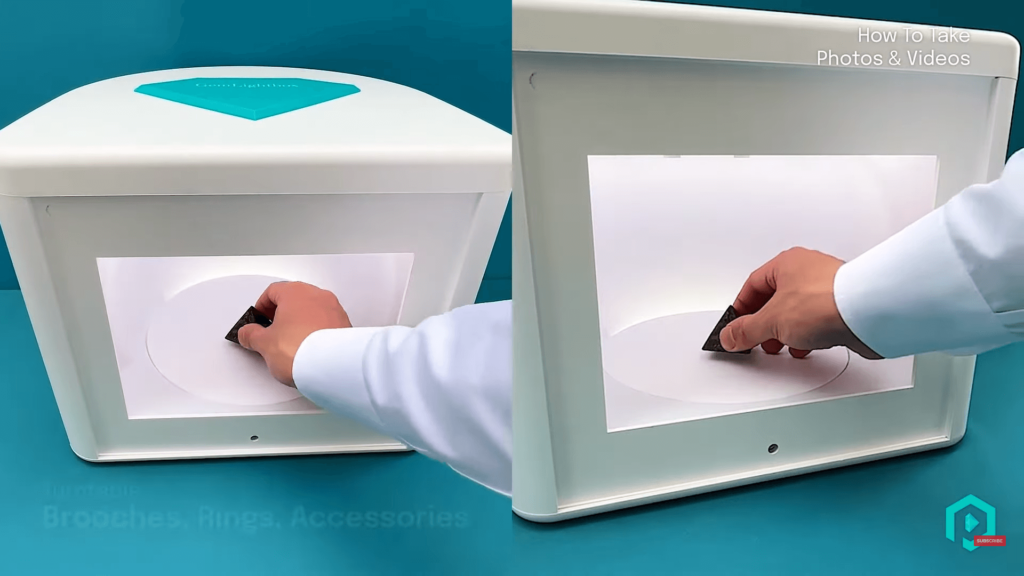
Once you have positioned your jewelry piece inside the GemLightbox Pro, you have the option to add another light, if required.
Use the Sparkle Light on all faceted stones to add sparkles to your diamonds and gemstones.

Use yellow light when capturing stones that require yellow light, such as emeralds, rubies, and other color-changing stones, to bring out their true color.

Step 2. Open the GemLightbox App

If you haven’t installed the GemLightbox App yet, simply search for “GemLightbox” on the iOS App Store or the Google Play Store.
Once you’re in the Application, open the Bluetooth and connect to the GemLightbox Pro. Then, place your smartphone on the smartphone stand that comes with the Pro and adjust it according to your desired angle.
Step 3. Click to capture

The Pro comes with an automatic feature that lets you capture four jewelry photos and one 360-degree video with just one click, saving you even more time. Simply click the capture button and you’re good to go.
Additional functions were also built into the design with the GemLightbox app. For instance, you can add your product SKU before saving the photos in the app gallery. The Share button in the app also provides you with a seamless file export process
You can watch the full GemLightbox Pro tutorial below.
Frequently Asked Questions:
What is the best lighting for jewelry photography?
The best lighting for jewelry photography is soft, diffused lighting.
How do you set up lighting for jewelry photography?
To set up your lighting, place one light source in the lightbox at a 45-degree angle to the product. The lightbox will diffuse the light, giving you a soft and even light distribution.
Is a lightbox good for photography?
Yes, a lightbox is the best tool for jewelry photography. It reduces the amount of work you need to do to capture studio-quality photos and helps you achieve the lighting required for your object.
How does a lightbox improve jewelry photography?
A lightbox improves jewelry photography by helping jewelers achieve soft, diffused lighting which is necessary for capturing reflective pieces. Most lightboxes also have a built-in white background which gives your jewelry piece a professional, uncluttered finish.
Can I use a lightbox for other types of photography?
Absolutely! Lightboxes come in different sizes and shapes. Choose the one that’s appropriate for your object.
How do you take pictures of earrings in a lightbox?
To photograph earrings, simply place your earrings on the turntable or earring stand, if you have one. Adjust the lighting, as desired, and click to capture. Click here to see our step-by-step process on how to photograph earrings using the GemLightbox.


0 Comments