
Table of Contents
- How to Photograph Rings with iPhone 12 and the GemLightbox
- Step 1. Power up the GemLightbox and remove the front reflector cover.
- Step 2. Put the rings inside the GemLightbox, on the turntable.
- Step 3. Position your iPhone 12 and open the GemLightbox application.
- Step 4. Open the camera to take photos or go to video mode to capture 360 videos.
- Step 5. Click to capture!

In today’s GemLightbox demonstration, we’re going to show you how to photograph rings with iPhone 12 in seconds. Get your smartphone ready and follow along!
iPhone 12 Camera
Released in the last quarter of 2020, iPhone 12 Camera got a DXOMARK score of 122. DXOMARK is an independent professional benchmarking company that scientifically assesses smartphones and cameras.
The rating is just outside the top ten in overall rankings; however, it lags behind flagships from Huawei, Xiaomi, Oppo, and Samsung. Nevertheless, iPhone 12 handles basic camera performance pretty well, delivers impressive video capabilities, and overall, records a respectable performance.
The iPhone 12 was a mainstream offering with a dual-camera setup. See below.

Now, let’s see how iPhone 12 works with the GemLightbox.
Read on!
Why Your Smartphone is More Than Enough for Jewelry Photography
In this blog post, we’ll give you several reasons why smartphone jewelry photography should be on your agenda right now. Click the link and find out!
How to Photograph Rings with iPhone 12 and the GemLightbox
Tools to use:
- GemLightbox and Turntable set
- GemLightbox app
- iPhone 12
Step 1. Power up the GemLightbox and remove the front reflector cover.

After powering up the GemLightbox, put the turntable inside and set it up. Watch here to see how to set up the turntable completely.
Step 2. Put the rings inside the GemLightbox, on the turntable.

We photographed two rings for this demonstration—one Cartier ring in rose gold and one Tiffany & Co in white gold.
Ensure that the rings are placed in the center of the turntable to avoid them from sliding farther away from the center when the turntable rotates. Don’t forget to put back the front reflector cover once you’re all set.
How Much is Photography Costing Your Jewelry Business?
Find out the average cost of photography for your jewelry business broken in this blog post, "How much are you spending on your photography?"
Step 3. Position your iPhone 12 and open the GemLightbox application.

Now, position your iPhone 12 in front of the device and open the GemLightbox application.
The GemLightbox app is available to download on both the Google Play Store and on the iOS App Store.
Unlike your native smartphone camera, the app optimizes your smartphone camera settings for jewelry photography to enable you to capture amazing results with every single click.
Step 4. Open the camera to take photos or go to video mode to capture 360 videos.
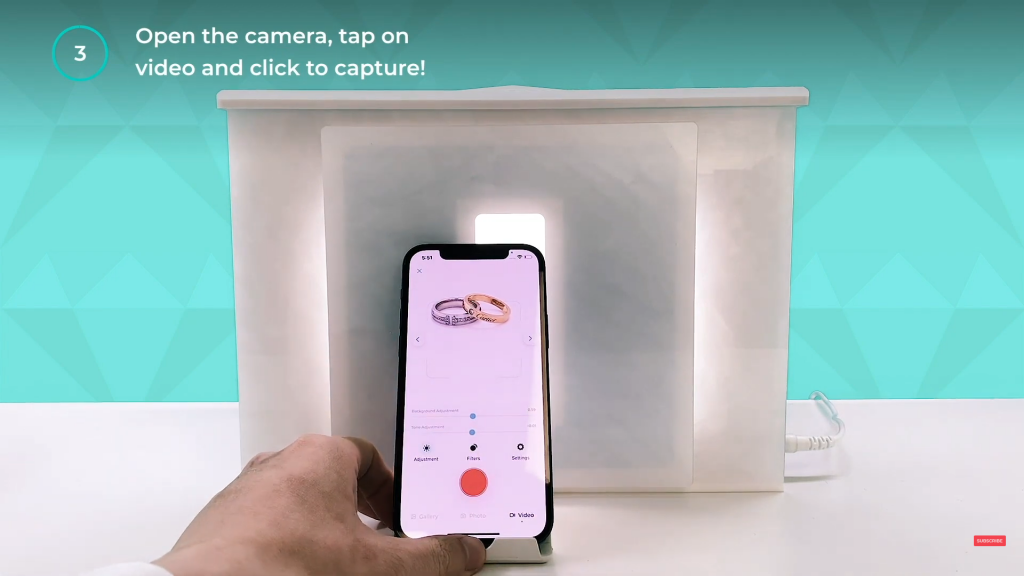
After connecting your GemLightbox application, open the camera to capture photos or go to video mode to capture 360 videos of the rings.
From here, you can also make adjustments that you deem necessary. You can zoom in or out, tap to focus, or adjust the brightness level as needed.
How to Speed Up Your Jewelry Photography Process
In a previous post, we wrote about how much jewelry photography was costing your business. In this post, we’ll go one step further and discuss the best practices you can use…
Step 5. Click to capture!

Finally, you can click to capture.
Don’t forget to click ‘save’ to save the photos and videos to the app gallery. This app storage enables you to post your visual assets to your social media or e-mail them directly to your clients. There are no photo retouching processes required.
It’s pixel-perfect in one click! See the final result below.

Watch the full GemLightbox demonstration below.


0 Comments