
Table of Contents
- Jewelry Photography Tips: How To Photograph a Necklace
- 1. Consider your lighting techniques: The power of soft, diffused photography lighting
- 2. Use white or black background depending on the qualities of your necklace.
- 3. Display your necklace using appropriate props
- 4. Show the details of the necklace from different angles
- 5. Highlight the pendant
- 6. Be creative with long necklaces
- 7. Photograph as if you’re your consumer
- 8. Always work with a positive vibe
- Frequently Asked Questions:
- How do you photograph a necklace?
- How do you take professional pictures of necklaces?
- How to photograph necklaces for sale?

Welcome to the first installment of our jewelry-specific photography how-to. This guide was designed to provide you with easy-to-execute technical know-how when photographing different pieces of jewelry— one that captures the quality image that your consumers want to see and images that will increase your browser-to-buyer conversion rate. In this post, we will talk about necklace photography, especially how to photograph a necklace in style.
In the past, a necklace was known to speak for wealth, social status, prestige, and affiliations among many others. The technology used, the design, and the materials communicated different cultural practices For instance, between the 14th and late 17th centuries, necklaces with gemstones and pendants were worn as a symbol of wealth and prestige. However, jewelry, like the cultures it represents, evolves. The trends changed and at times, have become cyclical although, generally, necklaces have transcended beyond traditional representations. Today, people, especially women, wear jewelry as a form of adornment; a fashionable piece that complements an elegant dress while also reinforcing identity and individualism.
Jewelry is one of the top gifts most often given on Valentine’s Day and other special occasions. Necklaces have taken precedence over other pieces of jewelry when it comes to gift applicability. Consumers attach an emotional value to every piece of the necklace they wear. As a jewelry retailer yourself, you must present your necklaces in a way that would appeal to the emotions of your target consumers. One of the factors that contribute to emotional appeal is the quality of your jewelry photography.
“A great photo conveys emotions. It is these emotions that connect your consumers to your jewelry. They make your piece shine and elevate the quality of your work.”
Jewelry Photography Tips: How To Photograph a Necklace
1. Consider your lighting techniques: The power of soft, diffused photography lighting

Lightboxes are typically used in jewelry photography because it helps diffuse lights evenly while creating dramatic shadows. The final result is also stunning as it exudes a romantic and dreamy vibe, thereby, making it popular among jewelers. Avoid using on-camera flash and front lighting as it often results in uninspiring and dull jewelry images. It appears flat and often results in glares due to the jewelry’s reflective surface.
You can use other lighting techniques to accentuate the beauty of your necklace. For example, you can illuminate your necklace from the side. This technique helps add depth to the jewelry image and can very well be used to highlight the texture of the subject. Ensure that your side lighting is positioned correctly to avoid harsh reflections.
2. Use white or black background depending on the qualities of your necklace.

White and black backgrounds are two of the most popular backdrops used in jewelry photography, although white is more prominent, especially for e-commerce product photography. Black works for light-toned pieces as it establishes a dramatic appeal; however, stones that aren’t perfectly cut would do best on a white background.
Choosing the right background is as impactful as the subject. The key is to choose backdrops that don’t overpower the subject. As a jeweler, you want consumers to be drawn to the piece automatically and not get distracted by a patterned or messy surroundings. While you’re free to experiment with this matter, especially if you want social media-ready images, always aim for primary photos that are captured on a white background.
A white background has several advantages. It is commonly preferred by known online marketplaces such as Amazon and eBay because of its professional look that helps improve consumer shopping experience. It makes the jewelry looks sophisticated and blends well with colored stones.
Be mindful when you choose to use black or other colored backgrounds as these can interfere with the reflection of the gemstones. It can have an optical effect that may cause consumers to perceive the color or quality of the stones differently. The last thing you would want is a negative review from a buyer complaining that the delivered product did not match the jewelry photographs. See the image below, for example. Although it shows a pair of earrings, the effect could be the same when photographing necklaces with colored stones.

3. Display your necklace using appropriate props

Use necklace stands when photographing the necklace so your consumers can visualize how it falls and how it would look on them when worn. The stands may vary depending on the length of the necklace, but you may choose to get multipurpose necklace stands that contain a few slots. For instance, this 14-slot necklace stand from Amazon will enable you to capture both a wider V-shape and a narrow necklace image.
If you’re shooting on a white background, don’t forget to choose a necklace stand that complements your light background. Always aim for a consistent look by choosing complementary props. It’s a way of providing your consumers with a fun and seamless shopping experience.
4. Show the details of the necklace from different angles
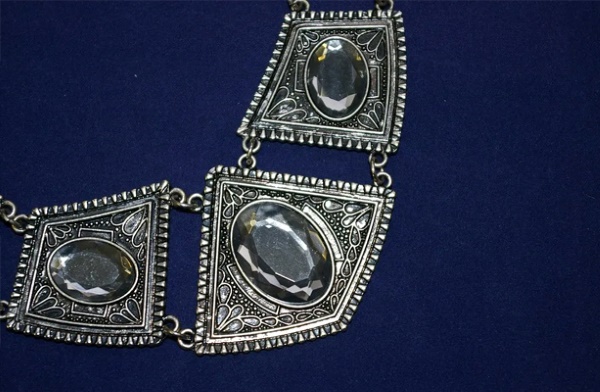
Capture various angles as much as possible for the consumers to easily understand what you’re selling them. Show them every angle, how the necklace looks when worn, the size and scale, other variations, and even when in different settings. In the age of online marketplaces, the lack of touch when online shopping can be bridged through visual communication. Don’t miss this opportunity to appeal to your consumers through images. Some jewelers neglect this critical aspect of their business, not minding the fact that 67% of consumers rely on images when making a buying decision while 63% give more weight to high-quality product images than good product descriptions.
5. Highlight the pendant
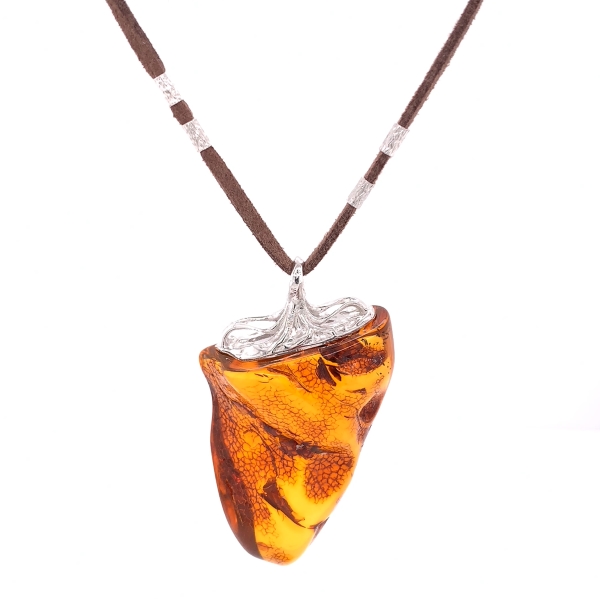
Are you photographing a necklace with a unique pendant?
Always suspend pendant necklaces to focus the viewers’ attention on the pendant, especially if the pendant has unique or special characteristics, like the amber pendant above. This will allow them to view the intricate details of the design, which could be your necklace’s best selling point.
To capture details, make sure you’re using the right camera for the job. You can also use the GemLightbox Macro if you’re after the pendant details alone. The Macro will allow you to capture magnified photos of the piece using just your smartphone.
6. Be creative with long necklaces
Long necklaces could be challenging to photograph because of their length which needs more space for you to work on it properly; however, it only takes creativity to tame this wild.
If you’re photographing extremely long necklaces, coil them around to form double or multiple loops to present them properly. You can also play with different shapes, altering focal points every time to highlight details or add interest.
7. Photograph as if you’re your consumer

If you’re the consumer, what kind of necklace images would you like to see? A few of your questions on necklace photography could be answered by putting yourself in their shoes and understanding it from their perspective.
When setting up for a necklace photo shoot, make sure to arrange or style the jewelry the way you’d like to wear it. Capture every facet you’d like to see. If the necklace has a unique quality, capture that element, so your consumers will see the same stunning piece you saw when you photographed it.
8. Always work with a positive vibe

Lastly, don’t forget to add emotions when you work on those photographs. In this case, your emotions when photographing the necklace also matter as the result images are an expression of your visual experience. So, before you hit that snap button, ask yourself, “what do I want my consumers to feel when they look at this necklace?”
Get more tips by watching how we photographed a Tiffany necklace using the GemLightbox Aerial and a smartphone.
Frequently Asked Questions:
How do you photograph a necklace?
Aside from focusing on the basics of photography such as lighting and equipment, you have to be creative to properly style different lengths of necklaces. Capture as many angles as possible and choose a background that complements your design.
How do you take professional pictures of necklaces?
To take professional pictures of necklaces, use a white background to make it look more pleasing without clutter in the background. Set up the right amount of lighting, and don’t forget to retouch or post-process the photos, if necessary.
How to photograph necklaces for sale?
When photographing necklaces for sale, we recommend that you use a white background which is the standard in e-commerce, and take photos of your necklaces from different angles to allow prospective buyers to peruse the piece extensively.
What challenges do you usually face when photographing a necklace? Feel free to share in the comment section below!


0 Comments