
Table of Contents
- Why is jewelry photo retouching important?
- Creating Emotions Through Beautiful Imagery
- The Basic Jewelry Photo Retouching Processes
- How to Touch up a Ring: A Step-by-Step Photoshop Tutorial
- Frequently Asked Questions:
- What is jewelry photo retouching?
- How to edit photos of jewelry?
- Who is the best company for jewelry photo retouching?
- How much is the photo retouching fee?
- Overall…

Why is jewelry photo retouching important?
Did you know that jewelry photo retouching is your go-to solution to stand out in an oversaturated market? Most independent jewelers would agree that photographing jewelry is one of the most challenging and trickiest activities in the jewelry business.
The pieces are highly reflective; colored gemstones appear dull while the intricate designs are not accurately captured. Meanwhile, the size and lighting additionally play a crucial role in producing professional quality jewelry images. Often, even a proper lighting setup is difficult to achieve. The lack of basic knowledge in commercial jewelry photography could easily sabotage your winning strategy despite the numerous developments in camera equipment.
Make no mistake. You don’t need to decide whether or not to post-process your product photos. If you want your e-commerce product images to stand out in the eyes of your online customers then, you absolutely must edit them. You just need to decide how your company will get the necessary edits done and who will do it. Background removal, lighting adjustments, reflection, and imperfection removal, shadow and contrast adjustments, and cropping and resizing can all be time-consuming tasks if you don’t know what you’re doing in Photoshop.
Take the time to learn how to use your company’s editing software, or even better, outsource your post-production tasks to a professional photo editor at Picup Media. We know how to craft product images that will wow your customers and increase the professional appearance of your website. Whatever you choose, remember this: If you want your retail business to succeed online, you have to make the quality of your product photography an absolute priority. Since customers can’t actually pick up and touch your products, your e-commerce photography is your number one tool for showcasing them in their best light and convincing buyers that they’re worth the money.
Jewelry Photography: A Comprehensive Guide for Jewelers
Jewelry photography is a notoriously difficult process. The gems are highly-reflective, the pieces are commonly small, and colored stones don’t appear as vibrant in photos as it is in reality....
Creating Emotions Through Beautiful Imagery
Nowadays, professional-quality jewelry images are unthinkable without the help of a jewelry photo editing service and other jewelry photo retouching techniques. It assists online jewelers in cementing a ‘wow’ effect in every capture while dramatically improving shoppers’ buying experience. No matter how persistent you are in convincing yourself that all purchases are a matter of meeting material needs, several studies have revealed that most purchases are emotional.
As a jeweler, I often hear most shoppers say, ‘I want this ring for my wife,’ or ‘I’m looking for a perfect necklace as an anniversary gift for my wife’, ‘My wife will definitely love this!’ These statements prove that jewelry is all about emotions, and these emotions should be reflected in the photograph.
When a shopper looks at your jewelry images, it should convey how the jewelry will make the wearer feel. Dull, blurry, and highly distracting jewelry images will not showcase the real beauty of your jewelry.
How Can Photo Retouching Refine Your Jewelry Product Images?
What is photo retouching? Improve your jewelry product images with these five business-changing photo retouching services you can get online!
The Basic Jewelry Photo Retouching Processes
How to Touch up a Ring: A Step-by-Step Photoshop Tutorial
Step 1. Clipping onto a white background
The method of using a white background in images is popular in the e-commerce industry, with many online sellers attributing their success to it. A piece of jewelry placed on a white background brings forward the subject and removes any distractions so the customer can focus on the product itself.
In this step, metals and stones will be clipped onto separate layers to achieve an endless white, non-distracting background. It is vital to mention that all elements of the jewelry need to have their own paths and layers as each element will need to be edited separately. The settings that apply to ‘metals’ layers cannot be applied to a ‘side-stone’ or a ‘main-stone’ layer.

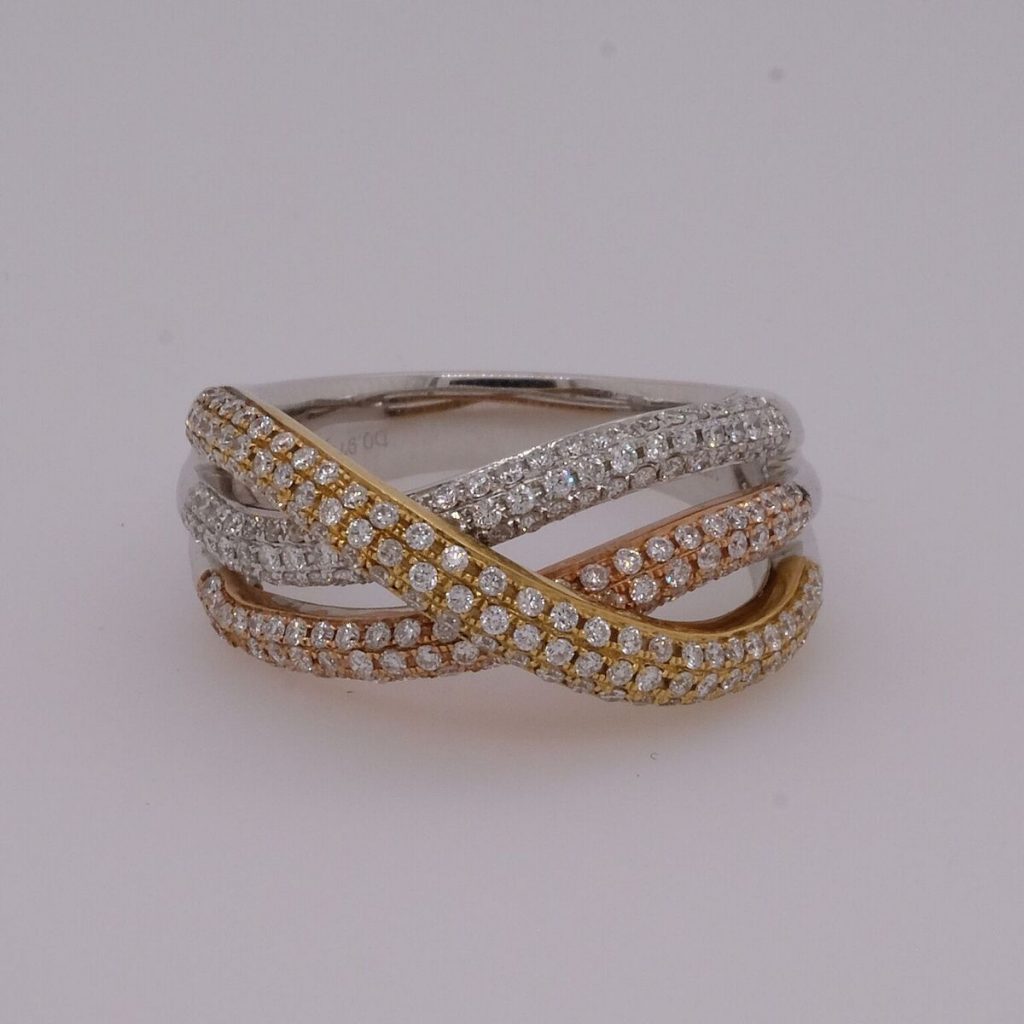

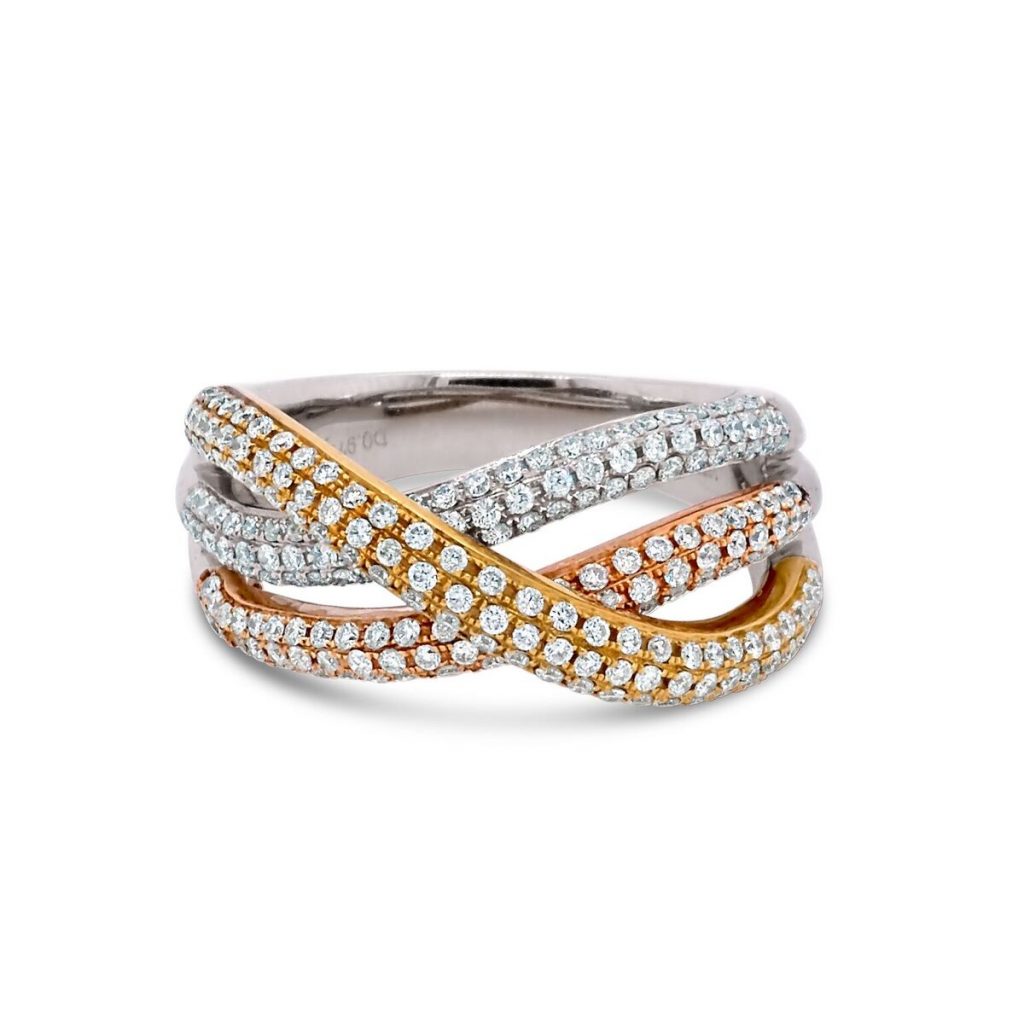
Notice how the ring comes to life as it stands out prominently against the white background. It shows how a white background photo commands the attention of the shoppers and allows them to see every detail of the ring better than the non-white background image.
To get an accurate close clip of the ring and gemstones, we use the Pen Tool in Photoshop with a feather radius of 1 -1.5 pixels.
For a detailed guide on how to use the Pen tool – click here.


Tips
- Zoom into 250 – 300% when pathing – this will allow you to see all the smaller curves you may miss.
- If you need to create a sharp edge or change direction in your path, hold the ALT/OPT key and alter the point. This will allow you to change the direction of the curve quickly
- Make a new pen path for each element. Paths can be accessed by Window –> Paths.
- To quickly select your path: right-click to Make Selection, or hold CMD and click on the path thumbnail on the Paths Window.
White background photography is a powerful online sales technique as it produces tangible and intangible benefits for both the shoppers and the jewelers. It increases conversion and sales by representing the product in a clear and detailed manner which influences the buying patterns of more than 67 percent of online shoppers.
Photo Retouching Steps to Improve Your Jewelry Photography
Three simple photo retouching tips that are guaranteed to improve your jewelry photography. Click the link to know more!
Step 2. Jewelry photo retouching process applicable for metals
Retouching the metals involves three main processes.
1. Removing dust
No matter how hard you try to keep your jewelry clean, there can be some dirt not easily visible to the naked eye. Part of our touch-up process involves removing dust, fingerprints, and other particles which are evident once the jewelry image is viewed.
There is a range of tools we use depending on the item and situation. However, these are the quickest and easiest ways to remove dust and fingerprints:
- Using the Spot Healing Brush Tool

The Spot Healing Brush looks outside the brushwork, analyzes the shapes there, and interprets them into the retouching along with colors and values – with varying degrees of success based upon the data in the surrounding areas. This tool is perfect for random dust spots that are on larger surface areas – It will not work as well if the dust appears on the edges.
- Using the Patch Tool

The patch tool is one of our favorites when it comes to convenience. It replaces a selected area with another selected source. The tool acts as a shortcut to the healing brush tool but again, it requires a good surface to replicate from.
- Using the Healing Brush Tool

The Healing Brush automatically matches the color and value so the user only has to choose a preferred texture, and Photoshop does the rest of the work. This tool is useful when retouching fingerprints and dust particles that are near the edges. The main advantage of using the Healing Brush tool is that you can preserve the base colors and gradients whilst having a soft transition into the base image when removing dust. However, the tool is reliant on having a source that is already smooth and beautiful to replicate.
2. Tidying up bad reflections
Photographing a ring or any other jewelry is almost similar to photographing a mirror. It is shiny with detailed designs that contribute to reflecting almost 99 percent of the lights around it. Jewelry photo retouching is commonly required when photographing colored gems. While they are mesmerizing to look at, these gems are difficult to capture because their facets can create reflections leading to unwanted blur. Our touch-up process will resolve these issues so you can display the best of your jewelry to your targeted shoppers.
Bad reflections are common in all jewelry touch-ups; whether it be a reflection of the camera lens, a light bulb, or simply the mannequin. The most common type of bad reflections we come across typically come from the back shanks, metals, and main stones. The best way to fix this is to capture images without bad reflections, to begin with. Take a better original photo without the bad reflections – we recommend using GemLightbox which is designed to capture pixel-perfect images using just a smartphone. The image used in this guide was shot using an iPhone 6 and GemLightbox.
Other common methods include the following:
1. We have created a library of ideal reflections that should occur in perfect photography – sometimes, if the reflection is too bad to retouch, we will replace it with our database parts.
2. Remove the bad reflections with the brush tool – we won’t go too far into detail with this as it’s more about artistic drawing and subject to perspective.
3. Use the healing brushes as demonstrated above to remove any unwanted black reflections.
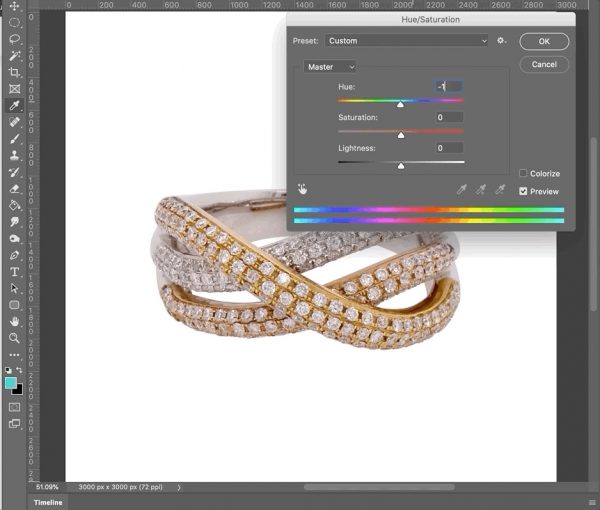
3. Color correction
Jewelry photo retouching is critical when it comes to achieving the appropriate color. Tidying up bad reflections, as shown in the image, and color correction are two critical processes that could tremendously improve the quality of the photo. Color correction is one of the most important when it comes to jewelry retouching. Many jewelers are concerned that their 18K white gold items look like platinum or silver.
There are a couple of methods that can be used to tweak the brightness and colors of the metals:

At Picup Media, we have created custom rules for color tones to make sure that all the metal tones come out consistent with the same color and brightness. Sometimes, we use Photoshop Lightroom and custom color-matching plugins in Photoshop; however, most metal coloration jobs can be completed using the methods shown above.
A 3/4 Angled Ring: The Jewelry Photo Retouching Process
This is the second part of 'How to Photograph Rings at a 3/4 Angle, ' this time showing the jewelry photo retouching process.
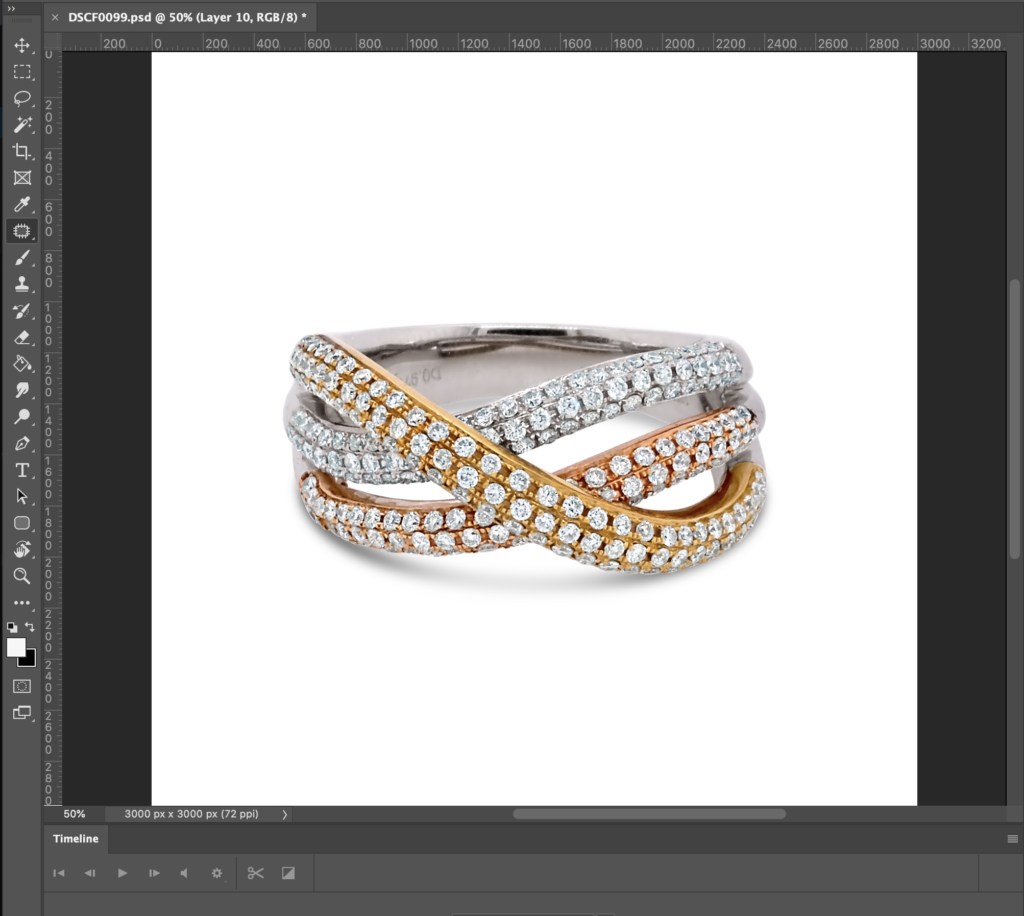
Step 3. Jewelry Photo Retouching: Gemstones and diamonds

Photographing diamonds and gemstones, like this ring, is one of the trickiest aspects of jewelry photography. It produces different flaws depending on the cut and types of stones which often require professional retouching help to correct. For example, excessive white light on flat surfaces and wrong positioning of light on faceted gems can cause glare. Our touch-up process is designed to eliminate these flaws and bring out the true depths of the stone, its shape, clarity, and color.
A couple of effective tools when it comes to diamond and gemstone retouching include:
This will allow you to tweak the brightness of the stone, contrast will bring out the color you need.
This will allow you to bring out the shadows and highlights of the stone.
Pick and choose the colors that you want to take out/ keep.
Undoubtedly one of the most important tools when it comes to diamond retouching – this will bring out all the tiny and large facets of your gemstones.
More detailed sharpening features that are useful for side stones.
Jewelry Retouching Service: Why do I need Image Retouching?
Seeking a jewelry retouching service might be all you need to revive your stagnating sales. Studies show that users’ engagement with attractive visual presentations is expected to increase in the...
Step 4. Create a natural shadow based on the ring’s position

While unwanted shadow in images can put off shoppers and is often treated as a nuisance, producing a natural shadow based on the ring’s position will not only make the jewelry appear realistic and natural; it can also increase your sales. It adds depth to the subject and absolutely makes the ring pop. Natural shadow helps entice shoppers and keep their attention focused only on where you intended it to be.
Behold the complete process – an enhanced ring image depicting its exact beauty and value!


Frequently Asked Questions:
What is jewelry photo retouching?
Jewelry photo retouching is a process of enhancing a photo to improve it visually. Some retouching methods include color correction, background and blemish removal, and resizing.
How to edit photos of jewelry?
The process of editing jewelry photos depends on the retouching method you want to implement but the basic processes include clipping onto a white background and removing blemishes using the spot healing brush tool. Use a photo editing app like Photoshop.
Who is the best company for jewelry photo retouching?
Picup Media has been working with over 10,000 clients in the jewelry industry, providing different services and solutions from jewelry photo retouching to jewelry photography solutions, and cloud management.
How much is the photo retouching fee?
There’s no definite answer to this one. The fees vary depending on the amount of retouching work you need to be done.
Overall…
Selling jewelry in an over-saturated market is challenging but not a dead end. It requires extreme effort from jewelers to create their mark and elevate their brand. With the right marketing, visual strategy, and jewelry photo retouching services and professionals, it is worth pressing on since saturation signifies a strong demand for the product.
Silence the noise. Make your jewelry images stand out!
Do you want more?
Learn how to retouch the back shanks of the rings and find out how we do it.


6 Comments
You have written a good blog! a complete description that a reader wants, I have written the same topic! please check my jewelry photo retouching blog I hope you like it.
I agree, jewelry retouching is very important. Dull and blurry jewelry product images are a turn-off that is why jewelry retouching requires expertise and a lot of patience. You really need to bring out a shiny, and stunning jewelry piece.
Very good tutorial. Learnt a lot. Thanks
Respect for knowing your stuff. But I feel sorry for the sucker that buys that ring online! Now, this is the kind of topic I want. All the very valid points explained straight to the subject. Excellent post!
Totally love it . Thanks for the effort.
Had some good tips. The post production photo still has the reflections though.